Using ANGEL Email
This series of webpages will walk you through using the E-mail in the ANGEL environment.
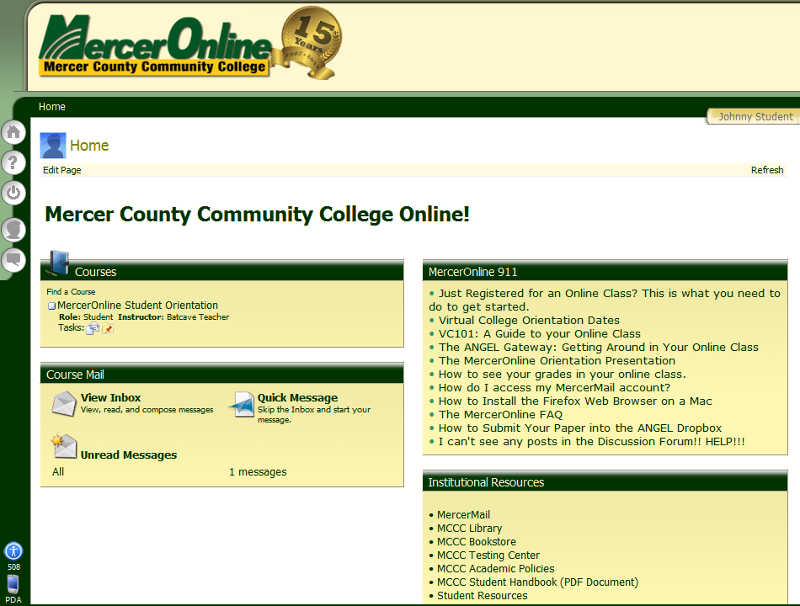
Once you've logged into ANGEL, you will be at your "Personal Home Page".
The page is organized into components called "Nuggets". In the example below, there are four nuggets: Courses, Course Mail, MercerOnline 911, and Institutional Resources.
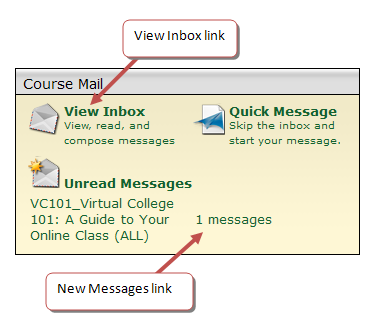
An example of the Course Mail nugget is shown below. To view your inbox, you can click on the "View Inbox" link. If you have any new messages, the nugget will show how many new messages you have in your inbox. Clicking on this link will also take you to your inbox.
|
|
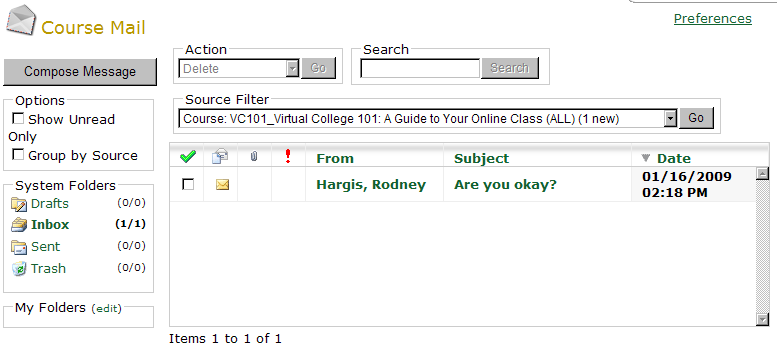
Clicking either the "View Inbox" or "New Messages" link will load your inbox. Any unread messages will be listed in bold type, with an "Unread Message" Icon
|
In the example below, you will see that there is one unread message in the Inbox.
To open the message, click on the Sender's Name or the Subject.
Once you've clicked on the Sender's Name or the Subject, the message will display.
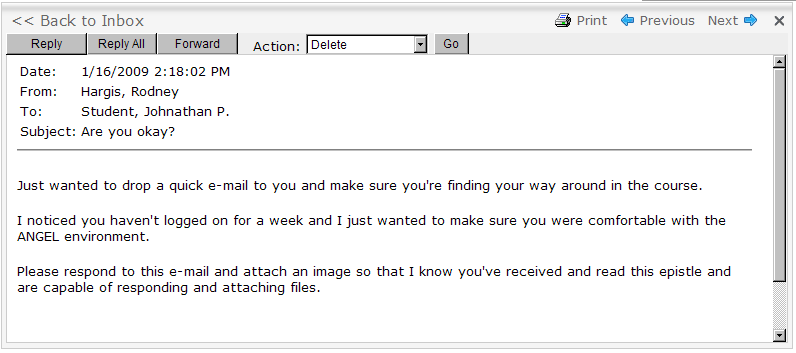
When the message is displayed, there will be a toolbar across the top of the message which will provide you with several functions. This document will demonstrate the use of "Reply", "Reply All", and "Forward" buttons.
To respond to the message sender, click the ![]() button.
button.
To respond to the message sender and all other persons who received a copy of the e-mail click the ![]() button.
button.
To send a copy of the message to another user, click the ![]() button.
button.
To print a copy of the message, click the ![]() icon.
icon.
Clicking either the ![]() or the
or the ![]() buttons will load the Email composer in a new window.
buttons will load the Email composer in a new window.
Type your text into the message box, and when you are ready to send the e-mail, click the "Send" button.
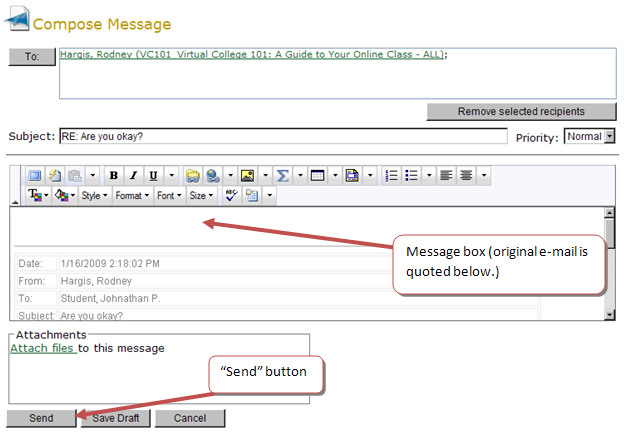
If you need to attach a file to your e-mail, click the ![]() link.
link.

Clicking on the ![]() link will bring up a window that looks like this:
link will bring up a window that looks like this:
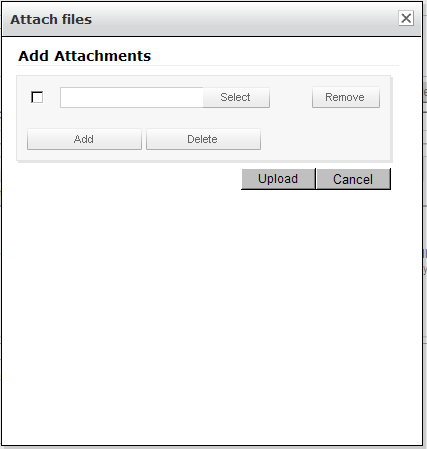
To attach a file, click the ![]() button to browse your computer for the file you wish to upload. Once you have selected the file to attach, click the
button to browse your computer for the file you wish to upload. Once you have selected the file to attach, click the ![]() button. ANGEL will then upload your file and attach it to the e-mail message. You will see the name of the attached file listed in the e-mail window.
button. ANGEL will then upload your file and attach it to the e-mail message. You will see the name of the attached file listed in the e-mail window.

If you accidentally attached the wrong file, you can remove the attached file from the email by clicking the ![]() link. To send the e-mail, click the
link. To send the e-mail, click the ![]() button.
button.
To forward a message to another ANGEL user, click the ![]() button.
button.
This will bring up a composer window. To select the user to whom you wish to forward the message, click the ![]() button. This will load the "Select Message Recipients" screen.
button. This will load the "Select Message Recipients" screen.
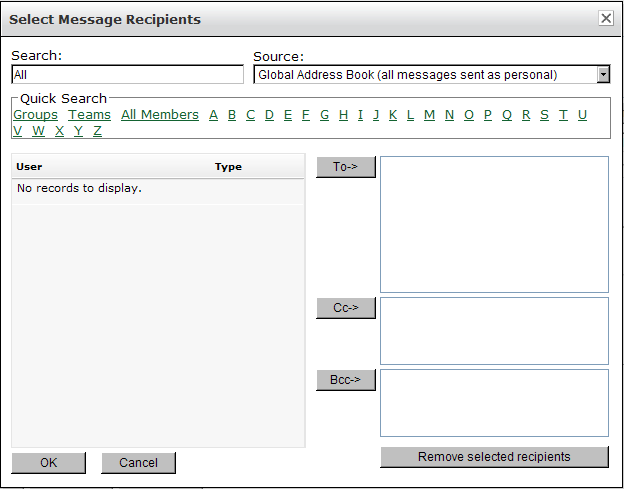
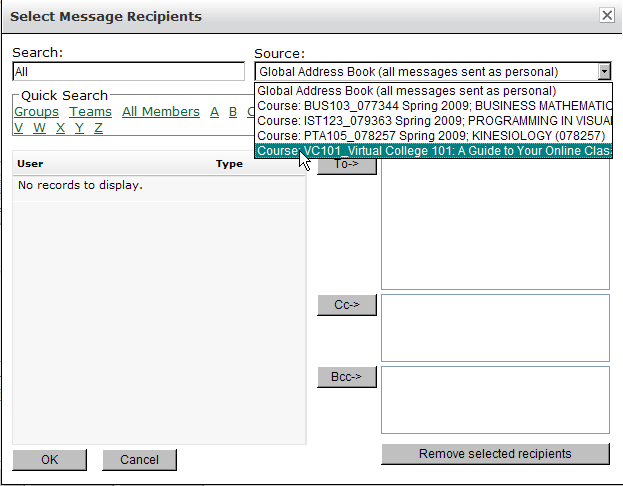
You will need to select the course that is appropriate for the e-mail. Click on the drop-down box labeled ![]() and select the appropriate course from the list.
and select the appropriate course from the list.
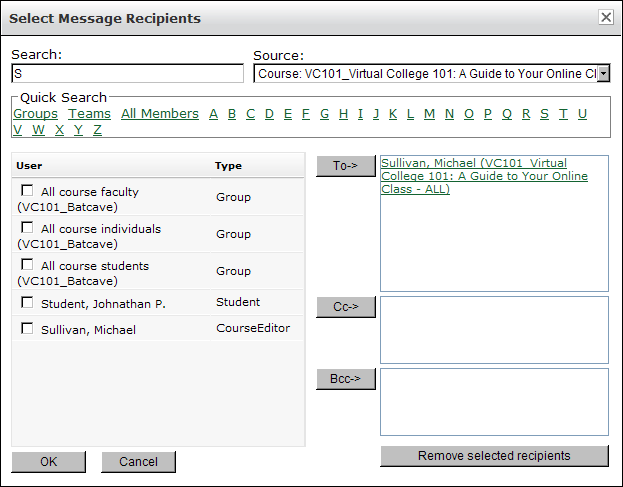
After a course has been selected, you can click on the letter of the recipient's last name and the list will populate with all available recipients.
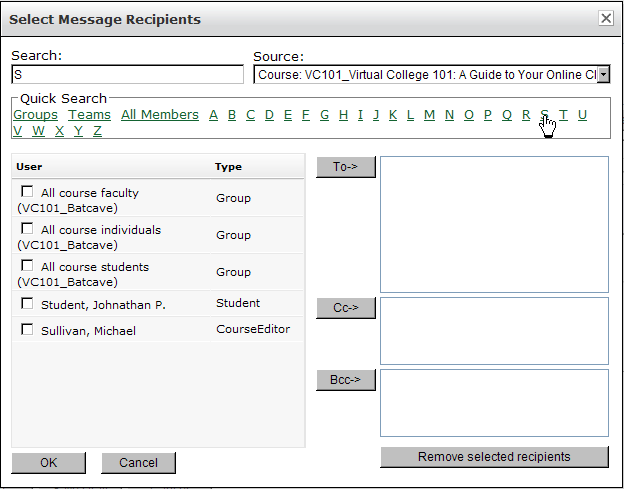
Click on the checkbox to the left of the recipient's name, and then click the ![]() button.
button.
You may also use the "Carbon Copy" or "Blind Carbon Copy" functions to send the message to other recipients by clicking the ![]() or
or ![]() buttons and adding recipients in the same manner. Once you've selected recipients for your message, click the
buttons and adding recipients in the same manner. Once you've selected recipients for your message, click the ![]() button.
button.
From your personal homepage, you can click on the ![]() link in the Course mail nugget and the e-mail composer will load. From within the e-mail module, you can click on the
link in the Course mail nugget and the e-mail composer will load. From within the e-mail module, you can click on the ![]() button.
button.
Once the e-mail composer has loaded, you will need to select a recipient for your message. To do this, click the ![]() button.
button.
|
NOTE: You CANNOT type an address into the To: field! You MUST click the |
This will load the "Select Message Recipients" screen. Before you can choose a recipient, you will need to select the course that is appropriate for the e-mail. Click on the drop-down box labeled ![]() and select the appropriate course from the list.
and select the appropriate course from the list.
After a course has been selected, you can click on the letter of the recipient's last name and the list will populate with all available recipients
Click on the recipient's name, and then click the ![]() button.
button.
You may also use the "Carbon Copy" or "Blind Carbon Copy" functions to send the message to other recipients by clicking the ![]() or
or ![]() buttons and adding recipients in the same manner. Once you've selected recipients for your message, click the
buttons and adding recipients in the same manner. Once you've selected recipients for your message, click the ![]() button.
button.